Welcome to the Audio-Technica AT-LP120USB manual, your comprehensive guide to setting up and operating this professional USB turntable. Designed for DJs and audiophiles, it offers detailed instructions and features like direct-drive motor, selectable speeds, and built-in phono preamp for optimal performance.
Overview of the AT-LP120USB Turntable
The AT-LP120USB is a professional-grade, direct-drive turntable designed for both DJs and audiophiles. It features a high-torque motor, selectable speeds (33, 45, and 78 RPM), and a built-in USB output for digital recording. The turntable includes a dual-magnet phono cartridge and Audacity software for easy vinyl-to-digital transfers. Its sturdy construction, forward/reverse playback, and pitch control make it versatile for professional and home use. The AT-LP120USB is a reliable choice for those seeking high-quality sound and advanced functionality.
Key Features of the AT-LP120USB
The AT-LP120USB turntable boasts a direct-drive motor for high-torque performance, enabling precise speed control. It features selectable speeds of 33, 45, and 78 RPM, catering to various record formats. The built-in USB output allows direct connection to computers for digital recording, while the included Audacity software simplifies vinyl-to-digital transfers. Additional features include forward and reverse playback, pitch control for beatmatching, and a strobe light for speed accuracy. The turntable also comes with a VM95E dual-magnet cartridge and a counterweight for optimal tracking, making it a versatile tool for DJs and audiophiles alike.
Why the AT-LP120USB is Popular Among DJs and Audiophiles
The AT-LP120USB is favored for its professional-grade performance, durability, and versatility. DJs appreciate its direct-drive motor for precise speed control and high-torque, enabling quick start-ups. The built-in USB output and included Audacity software make digitizing vinyl records effortless, appealing to audiophiles. Its forward and reverse playback, pitch control, and strobe light for speed accuracy are ideal for mixing and beatmatching. The turntable’s robust build, high-quality components, and VM95E cartridge ensure excellent sound reproduction, catering to both casual listeners and professionals seeking reliable equipment.
Unpacking and Accessories
The AT-LP120USB comes with everything needed for setup, including the turntable, dust cover, felt mat, counterweight, headshell, and USB cable. Additional accessories like the 45 RPM adapter and Audacity software are also included to help you get started with transferring vinyl to digital formats.
What’s Included in the Box
The AT-LP120USB package includes the turntable body, dust cover, felt mat, platter, counterweight, headshell with VM stereo cartridge, 45 RPM adapter, stylus target light, and dust cover hinges. You’ll also find an AC adapter, USB cable, and a quick start guide. Additionally, Audacity recording software is provided for transferring vinyl to digital formats. Ensure all items are present and undamaged upon unpacking. If any components are missing or damaged, contact your local Audio-Technica dealer for assistance.
Accessories You Might Need
While the AT-LP120USB comes with essential items, you may need additional accessories for enhanced functionality. A high-quality stylus cleaner and replacement needles ensure optimal sound reproduction. RCA cables can improve connectivity to external speakers or amplifiers. A turntable mat can reduce vibrations and static. For digital recording, a reliable USB cable and a computer with Audacity software are necessary. Optional DJ equipment like slip mats or a carrying case may also be beneficial for professionals. These accessories can enhance your overall experience and performance with the turntable.
Checking for Damages or Missing Items
Before using your AT-LP120USB, carefully inspect the turntable and accessories for any visible damage or defects. Check the turntable body, dust cover, and platter for scratches or dents. Ensure all included items, such as the headshell, stylus, counterweight, and USB cable, are present and undamaged. Verify the presence of the quick start guide and Audacity software. If any items are missing or damaged, contact your local Audio-Technica dealer or customer support for assistance. This step ensures your turntable is ready for proper setup and operation.
Refer to the manual for a detailed list of included accessories and troubleshooting tips if issues arise.
Installation and Setup
Setting up your AT-LP120USB involves connecting it to your computer via USB and installing the included Audacity software. Follow the quick start guide for a seamless setup process.
Ensure all components are properly connected and configured for optimal performance. The manual provides detailed instructions for both PC and Mac compatibility.
Step-by-Step Setup Guide
First, unpack and inspect all components, ensuring no damage or missing items. Place the turntable on a flat, stable surface and connect the power cord. Attach the headshell with the cartridge and balance the tonearm using the counterweight. Connect the USB cable to your computer and install the Audacity software from the provided link or CD. Follow the on-screen instructions to complete the software setup. Finally, configure the turntable settings in Audacity and test the connection by playing a record. Refer to the manual for detailed instructions and troubleshooting tips.
Connecting the Turntable to Your Computer
Connect the AT-LP120USB to your computer using the provided USB cable. Ensure the turntable is powered on and the USB mode is selected. Your computer should automatically recognize the device. Open Audacity, go to preferences, and select the AT-LP120USB as the recording device under the “Interface” section. Test the connection by playing a record and observing the audio levels in Audacity. If no signal is detected, check the USB connection and ensure the turntable is properly configured in your computer’s sound settings. Consult the manual for troubleshooting tips if issues persist.
Installing the Audacity Software
To install Audacity, visit the official Audacity website and download the software compatible with your PC or Mac. Once downloaded, run the installer and follow the on-screen instructions to complete the installation. After installation, launch Audacity and configure the settings to recognize the AT-LP120USB as the recording device. Under Preferences, select the turntable in the Interface section and adjust the recording levels as needed. Ensure Audacity is set up correctly before recording to achieve the best results. Consult the manual for detailed setup guidance.
Basic Operations
The AT-LP120USB offers intuitive controls for seamless vinyl playback. With a direct-drive motor and adjustable speeds, it ensures smooth operation for both DJs and audiophiles. Start spinning with ease.
Understanding the Controls
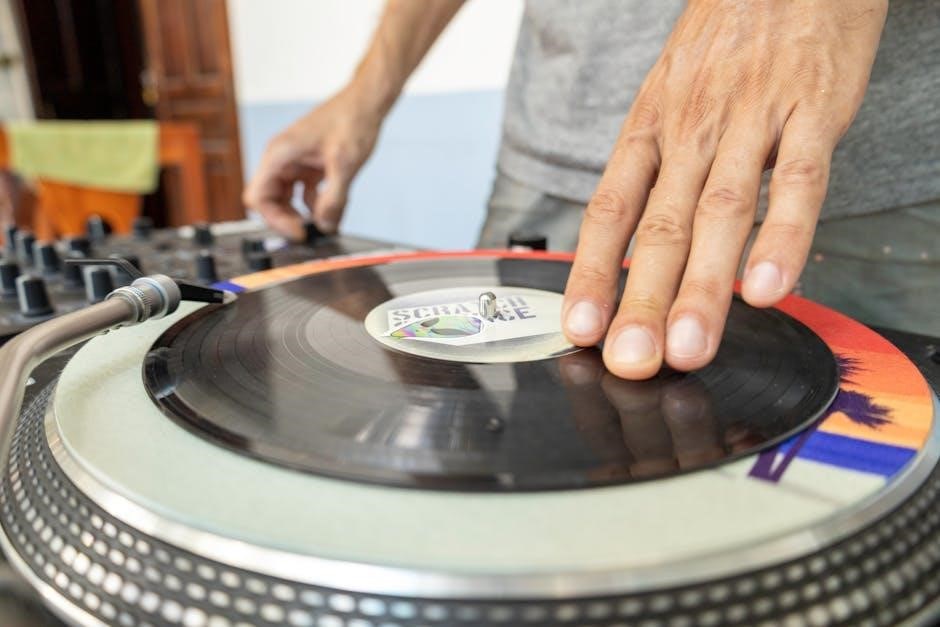
The AT-LP120USB features a user-friendly control panel with a speed selector (33, 45, 78 RPM), pitch control for adjusting playback speed, and a forward/reverse switch. The strobe light helps verify accurate rotation speeds, ensuring precise playback. Additional controls include a start/stop button and a tonearm lift. The built-in preamp switch allows for direct connection to speakers or external equipment. Familiarizing yourself with these controls enables smooth operation, whether you’re playing records or transferring vinyl to digital. This design caters to both casual listeners and professional DJs, offering versatility and ease of use.
Playing Your First Record
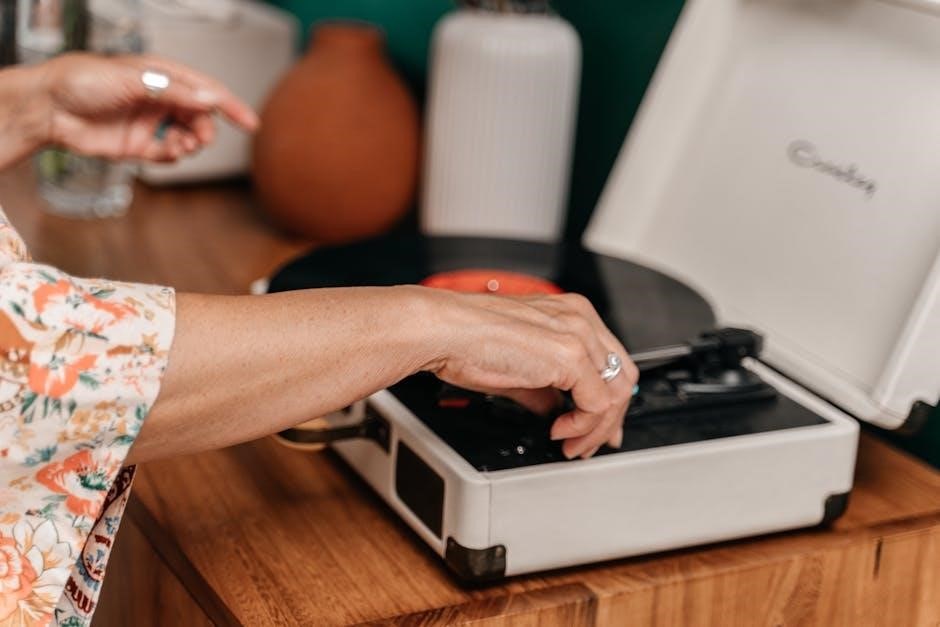
To play your first record, ensure the turntable is placed on a flat surface and powered on. Select the appropriate speed (33, 45, or 78 RPM) using the speed selector. Carefully place the record on the platter, securing it with the felt mat. Use the counterweight to balance the tonearm for proper tracking force. Gently lift the tonearm and align it with the record’s edge, then lower it to start playback. Monitor the record as it plays, adjusting the volume on your connected speakers or audio system for optimal sound quality.
Switching Between 33, 45, and 78 RPM
Switching playback speeds on the AT-LP120USB is straightforward. First, ensure the motor is turned off. Locate the speed selector knob on the turntable’s top right. Rotate it to choose 33, 45, or 78 RPM, depending on your record’s format. For added accuracy, use the built-in strobe light to verify speed consistency. Once selected, gently place the record on the platter and lower the tonearm. This ensures proper playback compatibility for all vinyl formats, maintaining high-quality audio reproduction.

USB and Digital Features
The AT-LP120USB includes a USB output for direct computer connection, enabling easy digital recording via Audacity software, making vinyl digitization simple and efficient.
Using the USB Output
The USB output on the AT-LP120USB allows seamless connection to your computer, enabling direct digital recording. Connect the turntable to your PC or Mac using the provided USB cable, and install the included Audacity software to begin transferring your vinyl collection to digital files effortlessly. This feature makes it simple to archive your records while preserving their quality, perfect for both casual listeners and professionals aiming to digitize their music library.
Transferring Vinyl to Digital
Transferring vinyl to digital with the AT-LP120USB is straightforward. Connect the turntable to your computer via USB, install the Audacity software, and begin recording. The turntable’s USB output ensures high-quality digital transfers, preserving the warmth and detail of your vinyl records. This process is ideal for archiving your collection or creating digital backups. The included software guides you through the recording and editing process, making it easy to convert your analog records into digital files for long-term enjoyment.
Setting Up the Software
Setting up the software for the AT-LP120USB involves installing Audacity, a free recording program. Connect the turntable to your computer via USB, then open Audacity and select the AT-LP120USB as the audio interface. Configure the recording settings to match your preferences, such as bitrate and file format. The manual provides step-by-step guidance to ensure a smooth setup process. Once configured, you can begin recording vinyl directly to your computer, with the software capturing high-quality audio for preservation or editing.

Audio Quality and Preamp
The AT-LP120USB includes a built-in phono preamp for clear, amplified sound. The counterweight ensures optimal cartridge tracking, enhancing audio quality for a precise listening experience.
Built-in Phono Preamp
Built-in Phono Preamp
The AT-LP120USB features a built-in phono preamp, eliminating the need for an external preamplifier. This internal amplifier ensures a clean, high-quality audio signal, making it ideal for both home use and professional setups. With adjustable gain settings, it accommodates a variety of cartridges and provides precise control over sound output. The preamp’s advanced circuitry minimizes noise and distortion, delivering a pure vinyl listening experience. This feature enhances connectivity options, allowing direct connection to amplifiers, sound systems, or recording devices without additional equipment. It’s a key element in the turntable’s versatility and sound quality.
Adjusting the Counterweight
Adjusting the counterweight on the Audio-Technica AT-LP120USB is crucial for optimal performance. Start by balancing the tonearm by moving the counterweight until the arm is horizontal. Use the scale on the counterweight to set the tracking force, typically between 1-3 grams. Ensure the anti-skate adjustment matches the tracking force for proper tracking. After adjustments, test the needle on a record to ensure stable playback without wobbling. Proper adjustment prevents damage and ensures high-quality sound reproduction. Follow the manual carefully for precise settings and maintain your turntable’s performance.
Optimizing Sound Quality
Optimizing sound quality on the AT-LP120USB involves ensuring proper setup and maintenance. Use the built-in phono preamp for direct connection to amplifiers or speakers. Adjust the counterweight and anti-skate to balance the tonearm, preventing distortion. Clean the stylus regularly and replace it as needed. Position the turntable on a stable surface to minimize vibrations. For digital recording, use high-quality software like Audacity to capture clear audio. Experiment with settings to enhance your listening experience, ensuring the best possible sound from your vinyl collection.
Advanced Features
The AT-LP120USB offers advanced features like forward/reverse playback, pitch control, and a strobe light for precise speed adjustment, catering to DJs and vinyl enthusiasts.
Forward and Reverse Playback
The AT-LP120USB features a convenient forward and reverse playback function, ideal for DJs and vinyl enthusiasts. This feature allows for creative scratching and playback techniques, enhancing your vinyl experience. To use it, simply press the reverse button, and the turntable will switch directions. This function is seamless and maintains audio quality, making it a versatile tool for both professional and home use. The manual provides clear instructions on how to operate this feature effectively, ensuring you get the most out of your turntable.
Using the Pitch Control
The AT-LP120USB features a pitch control function, allowing DJs to adjust playback speed with precision. The control enables seamless transitions between tracks by fine-tuning the tempo. Using the +/- buttons, you can increase or decrease the pitch in increments, perfect for beatmatching. The LCD display shows the pitch percentage, ensuring accurate adjustments. This feature is essential for professional mixing and creative performances. The manual provides detailed instructions on how to use the pitch control effectively, making it easy to master this advanced functionality and enhance your vinyl experience.
Strobe Light for Speed Accuracy
The AT-LP120USB features a strobe light to ensure precise speed accuracy. Located near the platter, the strobe illuminates markings to verify if the turntable is spinning at the correct RPM. To use it, play a record and observe the platter’s markings under the strobe light. If the markings appear stationary, the speed is accurate. If they move, adjust the pitch control slightly until they stabilize. This feature is particularly useful for DJs and audiophiles requiring precise speed control, ensuring professional-grade performance and reliable playback.
Maintenance and Care
Regularly clean the turntable, stylus, and platter with a soft cloth. Check the belt for wear and ensure proper handling of records to prevent damage. Avoid harsh chemicals and extreme temperatures to maintain optimal performance and longevity.
Cleaning the Turntable
Regular cleaning is essential for maintaining the performance and longevity of your AT-LP120USB; Use a soft, dry cloth to wipe down the turntable surface, platter, and tonearm. For more thorough cleaning, dampen the cloth slightly with distilled water, but avoid harsh chemicals or liquids that could damage the components. Gently remove dust and debris from the stylus using a specialized stylus brush. Always handle the stylus with care to prevent damage. cleaning the turntable ensures optimal sound quality and prevents the buildup of dirt that can affect playback. Refer to the manual for detailed cleaning instructions.
Replacing the Stylus
To replace the stylus on your AT-LP120USB, start by locating the stylus attached to the headshell. Carefully remove the old stylus by gently pulling it away from the cartridge. Next, align the new stylus with the cartridge, ensuring it is securely fastened. Use a magnifying tool if needed for better visibility. After installation, test the turntable by playing a record to ensure proper sound quality. Refer to the manual for detailed steps and recommendations for compatible replacement styli. Regular stylus replacement is crucial for maintaining clear and accurate sound reproduction.
Troubleshooting Common Issues
If the turntable isn’t spinning, ensure the power is on and the speed selector is set correctly. For no sound, check connections to the phono preamp or USB output. If distortion occurs, inspect the stylus for damage or debris. To address vibration, adjust the counterweight or ensure the turntable is on a level surface. For USB recording issues, restart your computer and ensure Audacity is properly configured. Refer to the manual for detailed troubleshooting steps and solutions to maintain optimal performance and resolve common problems effectively.
Digital Recording
The AT-LP120USB enables seamless digital recording via USB, connecting directly to your computer. Use Audacity software to transfer vinyl to high-quality digital files easily and efficiently.
Recording Vinyl to Your Computer
To record vinyl to your computer, connect the AT-LP120USB via USB and install Audacity software. Open Audacity, select the turntable as the recording device, and configure settings for optimal quality. Begin playback on the turntable and start recording in Audacity. Once done, save the file as a digital format like WAV or MP3. This process allows you to archive your vinyl collection and share files easily. The turntable’s USB output ensures a direct, high-quality transfer, making it simple to digitize your records.
Using Audacity for Editing
After recording, import your vinyl tracks into Audacity for editing. Use tools like trimming, cutting, and copying to refine your audio. Adjust levels, remove pops or hiss with noise reduction, and apply effects like EQ for enhanced sound. Split tracks into individual songs and label them for organization. Export your edited files in formats like WAV or MP3 for sharing or storage. Audacity’s user-friendly interface makes it easy to achieve professional-quality results, ensuring your vinyl collection sounds its best in digital format.
Exporting Your Digital Files
Once your recordings are edited, export them in your preferred format using Audacity. Select from formats like WAV, MP3, or FLAC, each offering different quality and file size options. Choose the bit depth and sample rate that match your needs, ensuring compatibility with your playback devices. Name your files appropriately and choose a save location for easy access. Audacity also allows you to export multiple tracks at once, streamlining the process. Your digitized vinyl collection will be neatly organized and ready to enjoy across various platforms.
Compatibility and Specifications
The AT-LP120USB is compatible with both PC and Mac, supporting 33, 45, and 78 RPM playback. It features a built-in phono preamp and high-torque direct-drive motor for precise operation.
Technical Specifications
The Audio-Technica AT-LP120USB features a direct-drive motor, cast aluminum platter, and selectable speeds of 33, 45, and 78 RPM. It includes a VM95E dual-magnet cartridge, USB output for digital recording, and a built-in phono preamp. The turntable supports both PC and Mac compatibility and comes with a USB cable and Audacity software for easy digitization. Dimensions are 450mm (W) x 353mm (D) x 157mm (H), making it a compact yet robust solution for vinyl enthusiasts and professionals alike.
Compatibility with PC and Mac
The AT-LP120USB is designed to seamlessly integrate with both PC and Mac systems, ensuring universal compatibility. Its USB output allows direct connection to computers, while the included Audacity software supports both operating systems. This makes it easy to digitize vinyl records regardless of your preferred platform, offering a versatile solution for music enthusiasts and DJs. The turntable’s driverless operation ensures quick setup, eliminating the need for additional software installations beyond Audacity for digital recording tasks.
Warranty and Support
The AT-LP120USB is backed by a 1-year warranty, covering manufacturing defects and ensuring reliable performance. For support, users can contact Audio-Technica’s authorized dealers or refer to the detailed manual. Additional resources, including troubleshooting guides and software updates, are available on the official Audio-Technica website, providing comprehensive support for optimal use and maintenance of the turntable.
The AT-LP120USB manual provides a detailed guide for optimal use of this professional turntable, ensuring a seamless experience for both DJs and audiophiles. With comprehensive support and a 1-year warranty, Audio-Technica guarantees reliability and satisfaction for all users.

Final Thoughts on the AT-LP120USB
The AT-LP120USB stands as a reliable and versatile turntable, catering to both DJs and audiophiles. Its robust design, direct-drive motor, and USB functionality make it ideal for digital recording and analog playback. With a built-in phono preamp and Audacity software, it simplifies vinyl-to-digital transfers. The included accessories and 1-year warranty ensure a hassle-free experience. Whether for professional use or casual listening, the AT-LP120USB delivers exceptional sound quality and durability, making it a top choice for music enthusiasts and professionals alike.
Where to Find More Resources
For additional support and resources, visit the official Audio-Technica website, where you can download the full manual, software guides, and firmware updates. User forums and communities, such as Reddit and DJ gear groups, offer valuable insights and troubleshooting tips. Retailers like Amazon and B&H Photo often provide detailed product descriptions and customer reviews. For warranty inquiries or technical support, contact Audio-Technica’s customer service team directly through their website or authorized dealers.