Cat Mate Cat Flap Instructions: A Comprehensive Guide
Navigating the world of cat flaps can be daunting‚ but this guide simplifies the installation process‚ ensuring a secure and convenient entryway for your feline friend․
From initial measurements to final adjustments‚ we’ll cover every step‚ offering insights into various Cat Mate models and addressing common issues encountered during setup․
This comprehensive resource empowers both DIY enthusiasts and those considering professional help‚ detailing cost considerations and essential safety precautions for a successful outcome․
Understanding Your Cat Mate Cat Flap
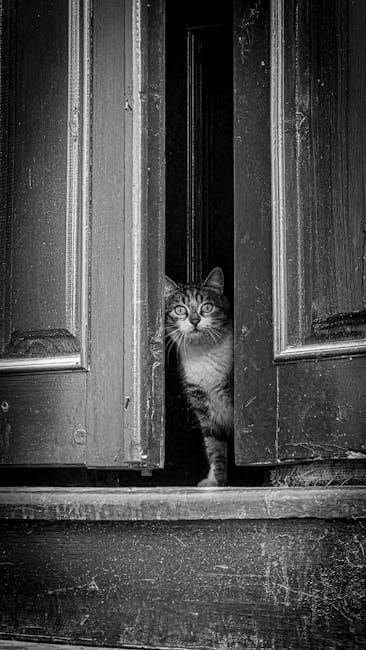
Cat Mate cat flaps represent a popular choice for pet owners seeking to grant their feline companions independent access to the outdoors․ These devices aren’t simply holes cut into doors; they’re engineered solutions designed with both cat comfort and homeowner convenience in mind․ Understanding the core functionality is crucial before embarking on installation․
Essentially‚ a Cat Mate flap operates as a swinging door‚ allowing your cat to pass through while minimizing drafts and maintaining security․ Many models incorporate magnetic closures‚ preventing unwanted animal intrusions and offering adjustable settings to accommodate varying cat sizes and personalities․ Some advanced versions even feature microchip recognition‚ ensuring only your cat gains entry․
The tunnel component is vital; alterations can impact functionality․ Choosing the right flap – manual‚ magnetic‚ or microchip-operated – depends on your cat’s needs and your security preferences․ Familiarizing yourself with these features will streamline the installation process and ensure a seamless transition for your furry friend․
Key Components and Their Functions
A Cat Mate cat flap comprises several key components working in harmony․ The frames – interior and exterior – create the structural housing within your door․ The flap itself‚ typically made of durable plastic‚ swings open and closed‚ providing access․ Magnetic closures‚ found in many models‚ control access and prevent drafts‚ adjustable to suit your cat’s weight․
The tunnel is a critical element‚ housing the magnetic system and influencing overall functionality; alterations here can affect performance․ Screws secure the frames together‚ with appropriate length being paramount for stability․ Some models include a draft excluder‚ enhancing insulation․ Microchip-enabled flaps feature a scanner and microchip reader for secure access․
Understanding each component’s role is vital for correct installation and troubleshooting․ Ensuring all parts are present and undamaged before starting will save time and frustration․ Proper assembly‚ particularly screw length‚ guarantees a secure and weatherproof fit․
Types of Cat Mate Cat Flaps Available
Cat Mate offers a diverse range of cat flaps to suit various needs and budgets․ Manual cat flaps are the simplest‚ providing basic access․ Magnetic cat flaps enhance security‚ responding to the magnet in your cat’s collar․ Microchip cat flaps offer the highest level of control‚ only opening for programmed pets‚ preventing unwanted animal visitors․
Infra-red cat flaps utilize a sensor to detect your cat’s unique infrared signature․ DualScan™ technology‚ found in some models‚ combines microchip and collar key recognition․ Size variations cater to different cat breeds and sizes‚ ensuring comfortable passage․ Wall-mounted options are available for installations where a door isn’t suitable․
Choosing the right flap depends on your cat’s lifestyle‚ security concerns‚ and your home’s construction․ Consider features like draft exclusion and weatherproofing when making your selection․
Pre-Installation Considerations
Before beginning‚ carefully assess your door type‚ measure your cat accurately‚ and gather the necessary tools for a smooth and successful cat flap installation․
Measuring Your Cat for the Correct Flap Size
Accurate measurements are crucial for selecting the right Cat Mate flap size‚ ensuring comfortable and easy access for your feline companion․ Begin by having your cat stand naturally‚ and measure the width at its widest point – typically across the shoulders․
Next‚ measure the height from the floor to the highest point of their back․ It’s vital to consider not just their current size‚ but also potential growth if you have a kitten․ Most cat flaps specify minimum and maximum shoulder width and height requirements․
Always err on the side of slightly larger if your measurements fall between sizes‚ as a flap that’s too small will be unusable․ Refer to the Cat Mate product specifications for detailed sizing charts‚ and remember that some models offer adjustable flap sizes for added flexibility․ A properly sized flap prevents drafts and ensures your cat’s freedom!
Choosing the Right Door for Installation
Selecting the appropriate door for Cat Mate flap installation is paramount for a secure and weatherproof fit․ Solid wood or uPVC doors are generally the most suitable‚ offering the necessary stability and thickness․ Hollow core doors are not recommended‚ as they lack the structural integrity to support the flap․
Consider the door’s construction; doors with a metal frame or reinforced core provide extra durability․ Ensure the chosen location is free from internal wiring or plumbing to avoid accidental damage during cutting․ A lower section of the door is preferable‚ accommodating most cat heights․
Remember to assess the door’s overall condition; a damaged or warped door may compromise the flap’s seal and functionality․ Prioritize a sturdy‚ well-maintained door to ensure a long-lasting and effective cat access solution․
Tools Required for Installation
Successful installation of your Cat Mate flap demands a specific toolkit․ A jigsaw is essential for creating the precise door opening‚ while a drill with various sized bits facilitates screw placement and pilot holes․ A measuring tape ensures accurate marking‚ and a pencil clearly outlines the cutting area․
Safety gear‚ including safety glasses and gloves‚ is crucial for protecting yourself during the process․ A screwdriver – both Phillips and flathead – is needed for securing the flap frames․ A level guarantees a straight and even installation‚ preventing drafts and ensuring smooth operation․
Additionally‚ a utility knife can assist with trimming any excess material‚ and sandpaper smooths rough edges․ Having these tools readily available streamlines the installation‚ making it a more efficient and safer experience․
Installation Process: Step-by-Step
Follow these detailed steps for a seamless installation: marking‚ cutting‚ frame preparation‚ interior/exterior frame fitting‚ and secure screw connections for optimal functionality․
Step 1: Marking the Door for Cutting
Begin by carefully positioning the Cat Mate flap against your door at the desired height‚ considering your cat’s comfortable access․ Utilize a pencil to trace the inner frame of the flap directly onto the door’s surface‚ creating a precise cutting guide․ Ensure the flap isn’t positioned too high or too low‚ allowing easy passage without requiring awkward jumps․
Double-check your markings‚ verifying they align with the flap’s dimensions and the door’s structure․ Consider the door’s thickness; some flaps require specific depths․ For accurate transfer‚ use a level to ensure horizontal alignment‚ preventing a crooked installation․ Remember to account for any existing door features‚ like panels or reinforcements‚ that might affect the cutting process․ Precise marking is crucial for a clean and professional result‚ minimizing the need for adjustments later․
Finally‚ clearly indicate the cutting line‚ making it easily visible throughout the next step․
Step 2: Cutting the Door Opening
Using a jigsaw‚ carefully begin cutting along the marked lines on your door․ Employ a fine-tooth blade designed for clean cuts in the door’s material – wood‚ uPVC‚ or metal․ Maintain a slow and steady pace‚ avoiding excessive force that could cause splintering or cracking․ Support the door adequately to prevent vibrations during the cutting process‚ ensuring a smooth and accurate result․
Initially‚ drill a pilot hole within the marked area to provide a starting point for the jigsaw blade․ Follow the traced lines precisely‚ making small adjustments as needed․ Periodically check the fit of the flap to ensure the opening is progressing correctly․ Be cautious when approaching corners‚ slowing down to maintain control and prevent overcutting․ Remove any loose debris or splinters immediately after completing the cut․
Smooth the edges with sandpaper if necessary‚ preparing the opening for frame installation․
Step 3: Preparing the Door Frame
After cutting the opening‚ thoroughly clean the door frame‚ removing any loose debris‚ dirt‚ or splinters․ Ensure the surface is smooth and free of obstructions to guarantee a secure fit for the cat flap frames․ Inspect the door’s internal structure; if it’s hollow‚ you may need to add reinforcing material for stability‚ particularly with heavier flap models․

Consider applying a sealant around the edges of the opening to prevent water ingress‚ especially for exterior doors․ This is crucial for maintaining the door’s integrity and preventing drafts․ Measure the depth of your door to select appropriate screw lengths for attaching the frames – too short‚ and they won’t hold; too long‚ and they’ll protrude through the other side․
Finally‚ double-check all measurements before proceeding to frame installation․
Step 4: Installing the Interior Frame
Begin by positioning the interior frame into the prepared door opening‚ ensuring it sits flush against the door’s surface․ Align the frame carefully‚ referencing the markings made during the initial measuring phase․ Insert the provided screws into the pre-drilled holes‚ starting with the top corners to secure the frame’s position․
Gradually tighten the screws‚ working your way down the sides and bottom‚ avoiding over-tightening which could damage the door or frame․ Check for any gaps between the frame and the door; if present‚ adjust the frame’s position slightly before fully tightening the screws․ Ensure the interior frame is firmly attached and stable‚ providing a solid base for the exterior frame․
Remember‚ proper alignment at this stage is critical for a smooth installation process․
Step 5: Installing the Exterior Frame
Carefully position the exterior frame onto the door‚ aligning it with the already installed interior frame․ Ensure a snug fit‚ checking that the weather seals are correctly positioned to create a watertight barrier․ Begin securing the exterior frame with the provided screws‚ starting with the top corners for stability․
Gradually tighten the screws‚ working downwards‚ and consistently checking the alignment between the interior and exterior frames․ Avoid over-tightening‚ as this can distort the frame or damage the door․ Pay close attention to the weather seals‚ ensuring they remain properly seated during the tightening process․
A secure and well-aligned exterior frame is crucial for weatherproofing and the flap’s functionality․
Step 6: Connecting the Frames – Screw Length Importance
The final step involves firmly connecting the interior and exterior frames‚ but screw length is paramount․ Using screws that are too short will result in an insecure connection‚ potentially leading to gaps and weather exposure․ Conversely‚ excessively long screws can penetrate through the inner door panel‚ causing damage and compromising safety;
Refer to the manufacturer’s instructions for the precise screw length recommended for your specific Cat Mate model and door thickness․ Ensure each screw is driven straight and tightened securely‚ but avoid over-tightening․ Key components are contained within the tunnel‚ so alterations affect functionality․
A properly secured connection guarantees the cat flap’s stability and long-term performance․
Post-Installation Adjustments & Settings
Fine-tuning your Cat Mate flap ensures optimal operation for your pet‚ including adjusting the magnetic closure and draft excluder for a perfect fit․
Adjusting the Flap for Cat Size
Ensuring the Cat Mate flap is appropriately sized for your feline companion is crucial for comfortable and independent access․ Begin by observing your cat passing through the flap; any hesitation or difficulty indicates a potential adjustment is needed․ Many models feature adjustable magnetic closures‚ allowing you to control the resistance required for the flap to open․
For smaller cats or kittens‚ reducing the magnetic force makes passage easier․ Conversely‚ for larger or more assertive cats‚ increasing the magnetic strength can prevent unwanted access from other animals․ Some flaps also offer height adjustments‚ enabling you to raise or lower the flap opening to better suit your cat’s stature․
Carefully review your specific model’s instructions‚ as adjustment mechanisms vary․ Regularly check the flap’s operation and make incremental adjustments until your cat confidently and comfortably uses the entryway․ Remember to prioritize your cat’s ease of use and safety during this process․
Setting the Magnetic Closure
The magnetic closure on your Cat Mate flap is a key feature controlling access and preventing drafts․ Most models offer adjustable magnetic settings‚ allowing you to tailor the flap’s operation to your cat’s size and strength․ Begin with the lowest magnetic setting and observe your cat attempting to use the flap․
If your cat hesitates or struggles‚ gradually increase the magnetic strength one notch at a time‚ testing after each adjustment․ The goal is to find the lowest setting that still allows your cat to push through comfortably․ A stronger magnetic closure is beneficial for multi-cat households or areas with roaming animals‚ preventing unauthorized entry․
However‚ avoid setting the magnetism too high‚ as this can discourage your cat from using the flap․ Refer to your model’s manual for specific instructions on adjusting the magnetic closure‚ ensuring a balance between security and convenience․
Understanding the Draft Excluder
The draft excluder is a crucial component of the Cat Mate flap‚ designed to minimize heat loss and prevent unwanted drafts from entering your home․ Typically‚ it consists of a series of overlapping brushes or a flexible rubber seal surrounding the flap’s opening․ This creates a tight seal when the flap is closed‚ effectively blocking airflow․
Regularly inspect the draft excluder for wear and tear‚ ensuring it remains intact and properly aligned․ Damage or misalignment can compromise its effectiveness‚ leading to drafts and increased energy bills․ Some models allow for adjustments to the excluder’s pressure‚ optimizing the seal․
Maintaining a clean draft excluder is also essential; debris accumulation can hinder its performance; A properly functioning draft excluder significantly enhances the energy efficiency and comfort of your home․
Troubleshooting Common Issues
Addressing hesitations‚ improper closures‚ and potential water leaks are common challenges; this section provides solutions to ensure your Cat Mate flap functions optimally․
Cat Hesitant to Use the Flap

If your feline friend is reluctant to embrace their newfound freedom‚ several techniques can encourage acceptance․ Initially‚ secure the flap open with tape‚ allowing your cat to freely pass through without resistance‚ associating the opening with positive experiences like treats or playtime on the other side․
Gradually introduce the flap’s movement‚ holding it open initially‚ then gently releasing it as your cat approaches․ Scent swapping – rubbing a cloth on your cat’s cheeks and then around the flap – can also help familiarize them with the new opening․
Ensure the flap isn’t too heavy or making startling noises when it closes․ A little patience and positive reinforcement are key; avoid forcing your cat‚ as this could create negative associations․ Consider using feline pheromone sprays near the flap to create a calming environment‚ further easing their transition․
Flap Not Closing Properly
A flap that fails to seal correctly compromises security and energy efficiency․ First‚ inspect the magnetic closure – ensure it’s clean and aligned with the metal plate on the opposing frame․ Adjust the magnet’s strength if necessary‚ using the adjustment screw typically found on the side of the flap․
Check for obstructions hindering the flap’s swing‚ such as debris or a misaligned frame․ Tighten all screws securing both the interior and exterior frames; loose screws can cause warping and prevent a proper seal․
Examine the draft excluder – this rubber seal around the flap’s perimeter should be intact and flexible․ If damaged‚ it may need replacing․ Remember that using the correct screw length during installation is crucial; overly long screws can interfere with the flap’s operation․
Water Leaks Around the Flap
Water ingress around the cat flap can damage your door and create drafts․ Begin by thoroughly inspecting the seal between the flap and the frame․ Ensure the draft excluder is intact and making full contact around the perimeter; replace it if it’s cracked or worn․
Verify that the exterior frame is properly sealed against the door surface․ Apply a weatherproof sealant around the frame’s edges if necessary‚ ensuring it’s compatible with both the frame material and your door․
Double-check that all screws are tightly secured‚ as loose fixings can create gaps․ Remember‚ proper installation is key – a watertight fit requires careful attention to detail․ Consider adding extra sealant during installation to prevent future leaks‚ especially in exposed locations․

Maintenance and Cleaning
Regular upkeep ensures longevity and smooth operation; consistent cleaning and screw tightening are vital‚ alongside periodic flap inspections for optimal performance․
Regular Cleaning Schedule
Establishing a consistent cleaning routine is crucial for maintaining your Cat Mate cat flap’s functionality and hygiene․ A quick wipe-down of both the interior and exterior frames weekly is recommended‚ using a mild detergent and a soft cloth to remove dirt‚ dust‚ and paw prints․
Pay particular attention to the flap itself‚ as it’s prone to accumulating grime․ Clean the flap every two weeks‚ ensuring it moves freely without resistance․ For stubborn dirt‚ a slightly damp cloth with a pet-safe cleaning solution can be used‚ followed by a thorough drying․
Monthly‚ inspect the magnetic closure and draft excluder for any debris or damage․ A clean draft excluder ensures a tight seal‚ preventing drafts and pests; Annual deep cleaning involves removing the flap (if possible‚ according to your model’s instructions) for a more thorough cleaning and inspection of all components․
Checking and Tightening Screws
Regularly inspecting and tightening the screws securing your Cat Mate cat flap is paramount for its stability and long-term performance․ Begin by visually examining all screws – both those connecting the interior and exterior frames‚ and those securing the flap mechanism itself – every three months․
Use a screwdriver of the appropriate size and type to gently tighten any screws that appear loose․ Avoid over-tightening‚ as this could strip the screw holes or damage the plastic components․ Pay close attention to the screws connecting the two frames‚ as these are critical for maintaining a secure and weatherproof seal․
Annually‚ consider removing each screw‚ cleaning the threads with a wire brush‚ and re-applying a small amount of thread-locking fluid to prevent loosening over time․ This proactive maintenance ensures your cat flap remains firmly installed and functions optimally for years to come․
Replacing the Flap (If Necessary)
Over time‚ the flap itself may become damaged‚ worn‚ or brittle‚ necessitating replacement․ Begin by carefully detaching the old flap from its hinges‚ typically involving the release of retaining clips or the unscrewing of small fasteners․ Consult your Cat Mate model’s specific instructions for the precise removal procedure․
Ensure the replacement flap is the correct size and type for your cat flap model․ Align the new flap with the hinges and securely reattach it‚ verifying smooth and unrestricted movement․ Check the magnetic closure mechanism to ensure it engages properly with the new flap‚ providing a reliable seal․
If the replacement is difficult‚ or you encounter any issues‚ refer to the manufacturer’s website or contact customer support for assistance․ A properly fitted replacement flap restores the cat flap’s functionality and weatherproofing capabilities․

Cost Considerations: DIY vs․ Professional Installation
DIY installation saves on labor‚ costing between £140-£570 for a manual flap and materials‚ while professional fitting adds £50-£200 to the overall expense․
Average Cost of Materials
The expenditure on materials for a Cat Mate cat flap installation varies significantly depending on the chosen model and door type․ A basic‚ manual cat flap can range from approximately £20 to £80‚ representing the cost of the flap itself․ However‚ for more advanced features like microchip recognition or weatherproofing‚ prices can escalate to £100 or even exceed £200;
Additional expenses include the necessary tools – a jigsaw (if you don’t own one)‚ drill‚ screws‚ and potentially sealant for weatherproofing‚ totaling around £30-£70․ If your door is particularly thick or requires an adapter tunnel‚ these components will add another £15-£40 to the material costs․
Remember to factor in the cost of any paint or varnish needed to touch up the door after cutting‚ typically around £10-£20․ Therefore‚ a complete DIY material budget generally falls between £65 and £330‚ depending on the complexity and features desired․
Professional Installation Fees
Engaging a professional for Cat Mate cat flap installation offers convenience but comes at a cost․ Labor charges typically range from £50 to £150‚ depending on the installer’s location‚ experience‚ and the door’s material – uPVC doors generally incur higher fees due to the complexity of cutting․
Some installers offer package deals that include both materials and labor‚ potentially simplifying budgeting․ These packages can range from £140 to £570 for a manual cat flap‚ encompassing the flap itself and the installation service․
For more sophisticated models with microchip readers or advanced weatherproofing‚ expect to pay between £200 and £650‚ reflecting the increased installation time and expertise required․ Obtaining quotes from multiple installers is crucial to secure a competitive price and ensure a quality installation․

Safety Precautions During Installation
Prioritizing safety during Cat Mate cat flap installation is paramount․ Always wear safety glasses to protect your eyes from debris when cutting the door‚ and consider gloves to shield your hands․ When using power tools like jigsaws‚ ensure the power cord is clear and you’re working in a well-lit area․
Exercise extreme caution when cutting the door; support the door properly to prevent it from falling and causing injury․ Be mindful of hidden wiring or plumbing within the door before cutting․ If unsure‚ consult a professional․
After cutting‚ smooth any sharp edges with sandpaper or a file to prevent cuts․ Finally‚ ensure the cat flap is securely mounted and doesn’t pose a tripping hazard․ Supervise children and pets during the entire installation process․